Mohawk Email for Students

How do I access my Mohawk e-mail?

Students can access their e-mail in several different ways. When corresponding with other members of the college community, it is expected that you use your Mohawk College email account.

Get started with the Mohawk E-mail Guide for Students⤻ from Academic Technology Services.

Access using a web browser

  1. Go to your cloud mailbox through Microsoft Outlook login (new window). Bookmark this link for later use.
  2. Enter your student number in this format: 000101060 [at] mohawkcollege.ca (000101060[at]mohawkcollege[dot]ca)
    You must enter your student number followed by @mohawkcollege.ca
  3. Enter your password

Important: DO NOT use your student number as an email address. You will not receive emails. Your proper email address contains your first and last name. Examples are given below.

Access using an IOS or Android device

See the Outlook Mobile guide (new window) from Academic Technology Services.

What is my Mohawk e-mail address?

Your Mohawk e-mail address uses your first and last name and may include numbers or dashes. Do not use your 9-digit student number as an e-mail address.

  • firstname.lastname [at] mohawkcollege.ca (firstname[dot]lastname[at]mohawkcollege[dot]ca)

  • firstname.lastname# [at] mohawkcollege.ca

  • firstname.last-name [at] mohawkcollege.ca (firstname[dot]last-name[at]mohawkcollege[dot]ca)

  • first-name.lastname [at] mohawkcollege.ca (first-name[dot]lastname[at]mohawkcollege[dot]ca)

  • firstname.last-name# [at] mohawkcollege.ca

  • first-name.lastname# [at] mohawkcollege.ca

  • firstinitial.lastname [at] mohawkcollege.ca (firstinitial[dot]lastname[at]mohawkcollege[dot]ca) (e.g. c.smith [at] mohawkcollege.ca (c[dot]smith[at]mohawkcollege[dot]ca))

What's the external e-mail disclaimer?

External sender e-mail disclaimer

The external e-mail disclaimer makes it easy to recognize messages sent from non-college e-mail addresses. Always use caution when opening emails from unknown, unexpected, or external senders.

If you're unsure about a suspicious e-mail, or believe your account might be compromised in any way, contact the IT Service Desk immediately.

How long do I get to keep my Mohawk email account?

Current Mohawk College students will retain access to their email accounts and MyMohawk for one year after the date of their last class. If a student re-enrols at a later date their original email account will be restored and again remain accessible until one year after the date of their last class.

Download your contacts from your student email

  1. At the bottom right hand corner of the page, select the People icon to open your contact list
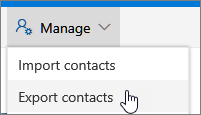
  2. At the top right-hand corner, select Manage > Export contacts
    screenshot showing the Manage Contacts Menu and Export Contacts option
  3. You can choose to export all of your contacts or only contacts from a specified folder. Once confirming what you require select Export
  4. At the bottom of the page, select Save to download "contacts.csv" or Save as to choose a save location.

Download your calendar from your student email

There is no export function for student calendars. You must share your calendar with your personal account to retrieve the desired events.

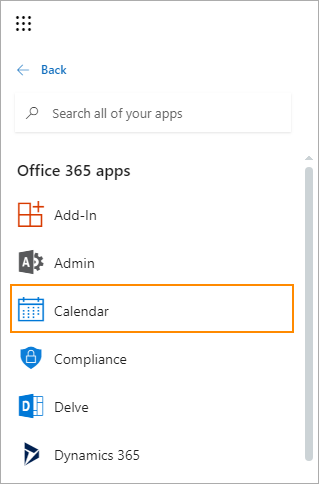
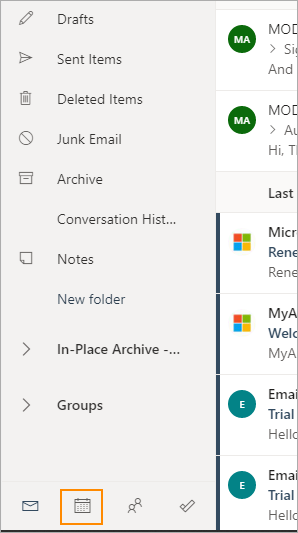
  1. Navigate to the calendar you want to share with your personal account. Click All apps to see the Calendar option, or click the Calendar icon in the bottom-left corner.
    Screenshot showing the location of Calendar in the apps menu
    Screenshot showing the location of the Calendar icon
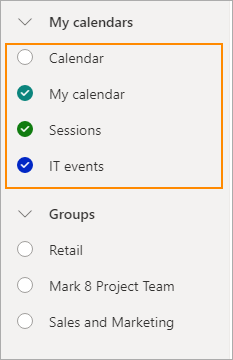
  2. Under My calendars select the calendar you want to share.
    Screenshot showing calendars selected with checkmarks
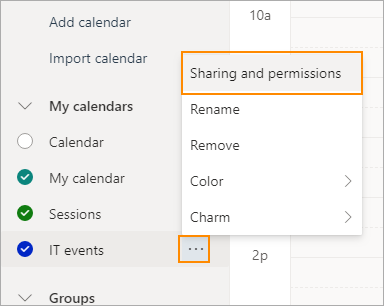
  3. Three dots will appear next to the calendar you have picked, click the dots and then click Sharing and permissions
    Screenshot of ... menu showing Sharing and permissions
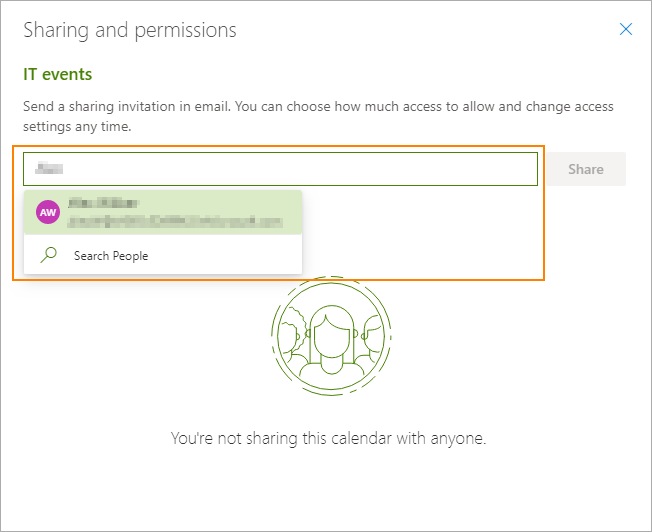
  4. Enter your personal email address where you would like your calendar events shared to
    Screenshot of box to enter your personal email address
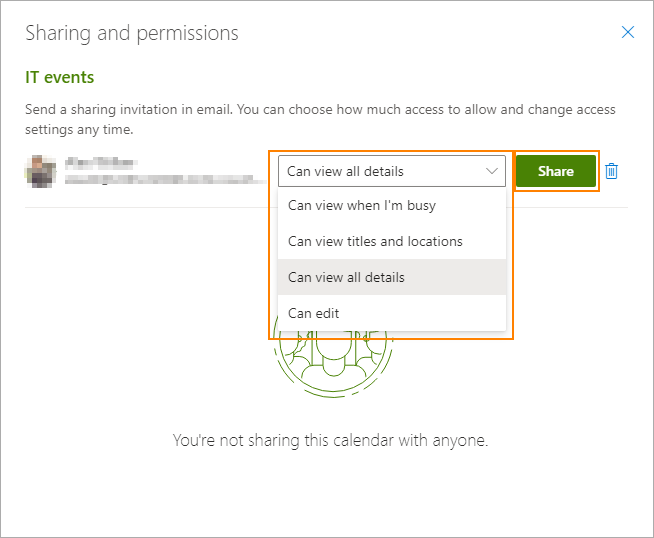
  5. From the drop-down menu, you can assign access to the calendar, in this case you would select Can View all Details, so you can make sure all events will be accessible in the personal account you are sharing with, then click Share
    Screenshot of permission option Can View All Details
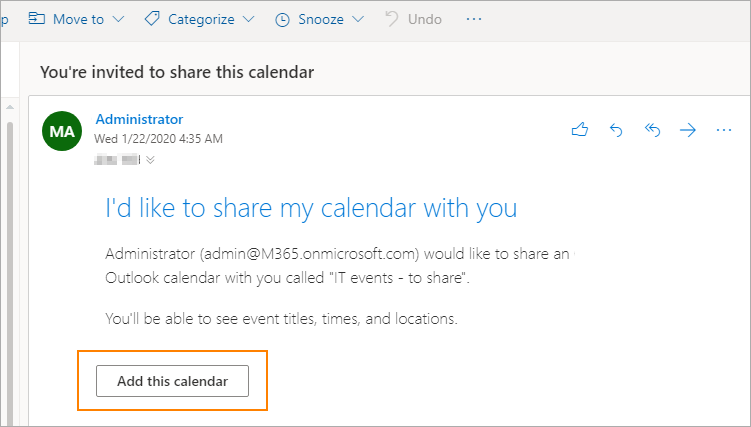
  6. Go to your personal email that you shared your calendar with. Open the mail to add the calendar to your account. Click the Add the calendar button
    Screenshot of message in personal email with Add this calendar button
  7. Depending upon your personal email e.g. Outlook.com, Gmail, Yahoo, locate the calendar section. The calendar you have shared with yourself will be present along with any other calendars.