Outlook Shared Mailbox & Calendar Pre-Migration Checklist
This checklist will help you prepare to migrate your Mohawk College shared mailbox and or calendar to the cloud (Microsoft 365). Various links are included with instructions.
Record your Shared Mailboxes
Check your Outlook profile and record the names of your shared mailboxes. They will need to be re-added to your profile after migration.
To find your shared mailboxes:
- In the main Outlook mail view, you will see your personal Mohawk email address on the left side. Shared mailboxes will appear below your personal Mohawk email account.

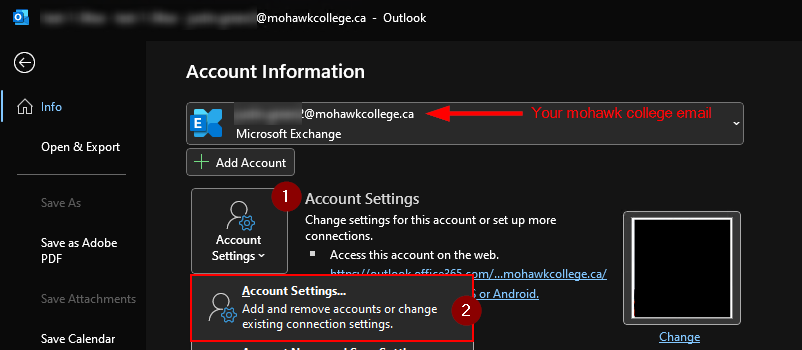
- Or, in your Account Information under File > Info. Click the drop-down menu at the top to see the shared mailboxes.


Record your Shared Calendars:
Make a note of all shared calendars you have in Outlook. This list will help when it comes time to re-add to your account post-migration.

Recommended: Remove shared mailboxes and calendars just before your migration date
All shared mailboxes and calendar must be re-added to your account when migration is finished. You can proactively remove them just before your migration date to save some work after the move is completed.
To remove a shared mailbox from Outlook:
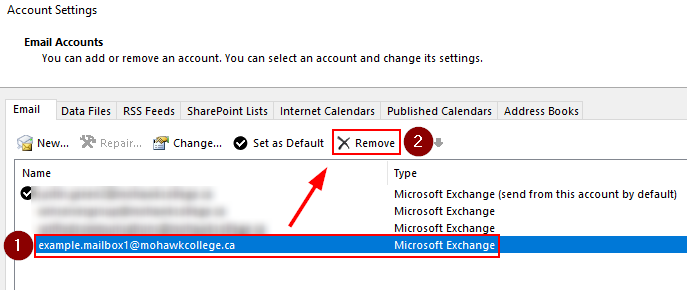
- Go to your account settings under File > Info > Account Settings > Account Settings

- Select the shared mailbox and click Remove

To remove a shared calendar from Outlook:
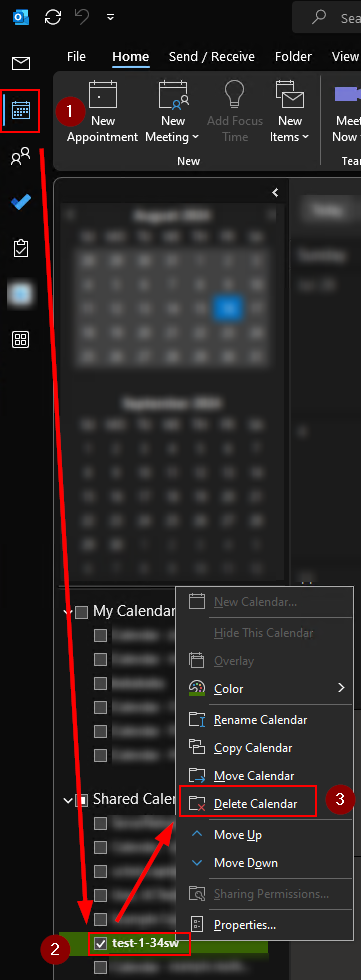
- Go to the Calendar view
- Under Shared Calendars right-click the calendar you wish to remove and click Delete Calendar


